If you are looking for neutral Christmas tree decorations then making some DIY air clay ornaments is the perfect solution.
These simple DIY shooting star clay ornaments add the perfect Scandinavian Christmas touch.


It is no secret that I love the minimalist look of Scandinavian decor.
My home decor is influenced heavily by neutral color palettes and natural wood elements.
That is why during the Christmas season, I love to embrace Scandinavian Christmas decoration ideas.
Scandi Christmas Ornaments
Scandi Christmas decorations are full of neutral tones and rustic elements.
The Nordic folk like to make things light and comforting during the dark winter season to make the days seem brighter.
During the holiday season, they make many homemade ornaments using natural elements like wood, dried oranges, pine, and even white clay.
Making Christmas ornaments from clay is a very old tradition, that can easily be personalized.
So if you are a fan of modern design and minimalism like I am, then making white clay ornaments for your Christmas tree will add the perfect Scandi Christmas touch.
There are plenty of clay Christmas ornament ideas you could make. The options are pretty much endless.


DIY Clay Shooting Star Ornaments
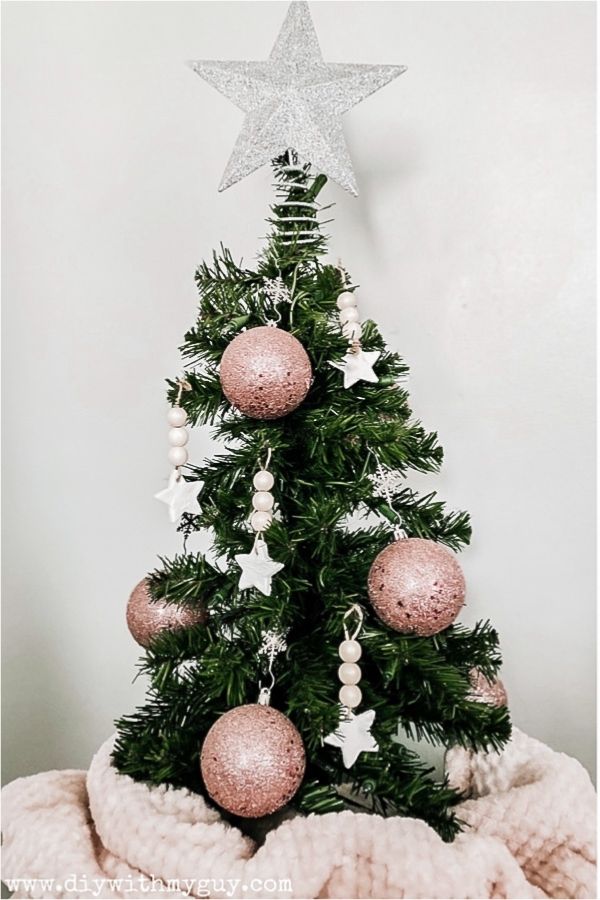
My daughter wanted to decorate her mini Christmas tree with “shooting star ornaments“, so that is one of the handmade ornaments we decided to make this year.
I use wooden beads on many of my crafts (like this wood-beaded pumpkin) so it just felt right to add wood beads to the clay stars.
How To Make Clay Star Ornaments
What you will need:
- small star cookie cutters
- a rolling pin
- air dry clay
- wax paper
- 16mm wooden beads
- twine
Instructions to make the shooting star ornament:
- Roll the air dry clay out on a flat surface.
- Decide how thick you want your ornaments to be. For the shooting star ornaments, we made them a quarter of an inch thick.
- Use small star-shaped cookie cutters to cut out the stars.
- Use a toothpick to round out a good-sized hole in the top of the star for hanging.
- Have a bowl of water nearby to dip your fingers in to smooth out all the rough edges of the clay star.
- Let the stars dry on wax paper. Drying times may vary. Our stars took 48 hours to dry, we flipped them over after 24 hours. Remember, the stars will not be white until they are completely dry.
- When the stars have completely dried, cut each piece of twine to be 9 inches.
- Pull the twine through the hole of the star and make sure the twine meets evenly at the top.
- Add three beads to the twine, making sure to stick both sides of the twine in the wooded bead holes.
- Tie a small loop on the top and cut off any leftover strings.
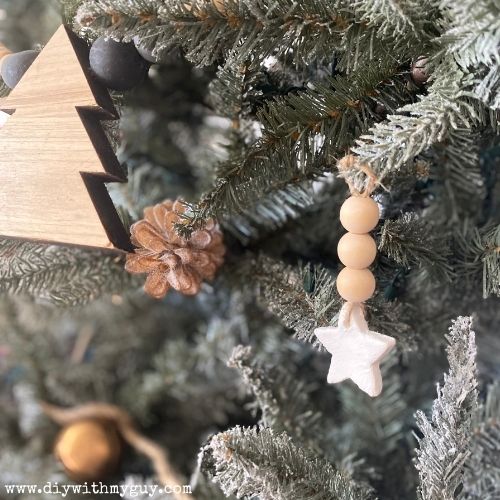
Shooting Star Christmas Tree Ornaments
These ornaments turned out so pretty. It is such an easy DIY and it goes well with any decor.
I loved how beautiful they look next to pinecones and the wood bead garland on our Christmas Tree.

My daughter decorated the mini Christmas tree in her bedroom with these shooting star ornaments to make the cutest Christmas tree full of stars.

For more handmade Christmas ornaments, check out the rustic fabric wrapped ornaments we made last year.
These white clay star ornaments go perfectly with the DIY Christmas card holder we have beside our tree.
I might even incorporate these clay stars into my kitchen cabinet wreaths. There are just so many different ways they can be used for holiday decor.
Don’t forget to download your FREE Christmas Planning Printables.
Let me know in the comments if you and your family make these clay shooting star ornaments.
Wishing you and your family a Merry Christmas and good tidings for the New Year.
Cheyenne
Friday 18th of December 2020
Awhh I love this! I might just have to do this myself:)
Damaris Russell
Thursday 17th of December 2020
Oo I love these so much! I've been getting into more natural Christmas decor, I do really like Scandinavian style decor.
Ann Syson
Friday 11th of December 2020
These are adorable! It doesn't look too difficult to do, and they aren't too girlie so maybe boys would enjoy it! I pinned to my craft board!
Bella
Friday 11th of December 2020
So beautiful, love them.