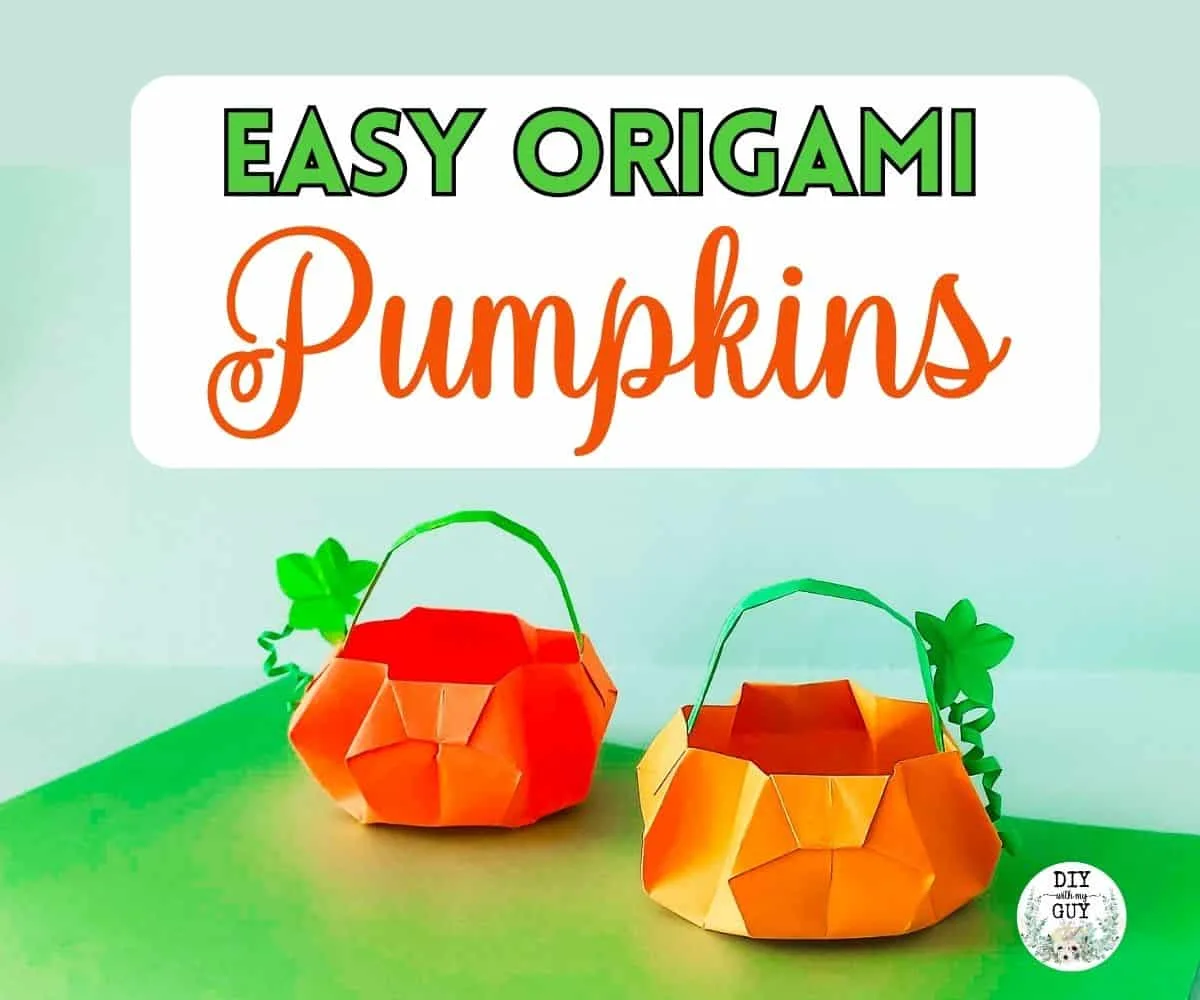
Let’s make some 3D origami pumpkins!
With a simple tutorial on how to make easy origami pumpkin baskets step-by-step!

Fall is here, and what better way to celebrate than by making fun and festive fall crafts?
I will be going over a simple tutorial with you on how to make an origami pumpkin basket.
This simple yet eye-catching origami pumpkin is perfect for this time of year and will impress everyone!
You can fill each of these origami pumpkin baskets with treats to give out on Halloween, for a classroom party, or even fill with treats to pass out to your co-workers.
All you need is some folded paper, a bit of patience, and a willingness to learn simple origami folding techniques!
I promise with just a square sheet of paper, you can create a cute and functional origami basket in the shape of a pumpkin.
In this tutorial, I will guide you step by step on how to fold your very own origami pumpkin basket.


How To Make An Origami Pumpkin Basket
With easy-to-follow instructions and helpful images, you can create a cute 3D origami pumpkin basket perfect for holding treats, small items, or even as a decorative piece for your home.
So grab your paper, and let’s get started with the pumpkin origami instructions for this fun and festive fall craft!
Supplies Needed:
- Orange and green craft papers or origami paper
- Scissors
- Glue


Origami Pumpkin Basket Step By Step


Step 1: Choose a square piece of paper for the origami pumpkin basket and a green strip for the basket handle. Make sure the paper is of a suitable size for the desired size of the basket.


Step 2: Take the square paper and fold it in half diagonally on both sides.
Unfold the diagonal folds to create four creases.


Step 3: Flip the paper over and make half horizontal and vertical folds.
Unfold again to create four more creases.


Step 4: Fold out the horizontal and vertical creases and then fold along the diagonal creases.
This will create a smaller square shape with diagonal creases.


Step 5: Flatten the origami pattern with the horizontal and vertical creases facing outwards.
This will create a diamond shape with creases on each side.


Step 6: Now it’s time to work on the four flaps.
Hold any one of the closed sides and align it with the middle crease of the current pattern.


Step 7: Unfold the last fold made on the flap, which should be the crease closest to the center of the diamond shape.


Step 8: Open that particular flap through its open side, creating a small pocket.


Step 9: Fold the flap along the previous creases, which should be the two diagonal creases, and flatten it with the main pattern.
This will create a small triangle shape.


Step 10: Move to the next flap by turning the current-folded flap to the right or left side.


Step 11: One by one, fold all four flaps using steps 7-9, creating a series of small triangles that will make up the sides of the pumpkin basket.


Step 12: Rotate the current pattern with the narrow side facing down.
Turn or fold-out any one of the flaps. Alternatively, turn the right flap to the left.


Step 13: Hold any one of the top-diagonal sides and align it with the middle crease of the current pattern.
Fold it along the crease to create a small triangle.


Step 14: Similarly, fold the other top-diagonal side along the crease to create another small triangle.


Step 15: Notice the narrow middle part between the two triangles.
Fold it all the way down and align it with the open edge of that side, creating a small pocket.


Step 16: Fold in the extra part of the last fold inside the pocket, securing the two triangles in place.


Step 17: Turn and fold all 4 sides the same.


Step 18: Take the narrow part of the current pattern and fold it in half.
Then, unfold it again to create a crease.


Step 19: Carefully open the current origami pattern through the open end, ensuring that all folds are neat and precise.
Step 20: If necessary, apply glue to the open-end folds to secure them in place and prevent the basket from coming apart.
This will create a more sturdy and durable pumpkin basket.
Step 21: Open up the whole origami pattern neatly to give it a pumpkin-like look.
Take the green strip and fold it three times to create a sturdy handle for the basket.
Each fold should be made along the length of the strip to create a long, narrow handle.


Step 22: Attach the green handle to the origami pumpkin basket on the top sides, making sure it is securely fastened.


Step 23: To decorate the pumpkin basket, trace and cut out leaf and vine patterns on green paper.
Attach them to the basket using glue to create a festive and personalized look.
Be sure to check out our other fall pumpkin crafts, like this wood beaded pumpkin, or how to make faux heirloom pumpkins.